SignalR from Microsoft .NET is a great tool for adding real-time websocket functionality to web applications. The latest libraries simplify the process to add Hubs to your .NET API projects, and the technology makes sending messages between client and server work really well.
But if you are a .NET developer working on an API, the options for trying out those SignalR hubs have always been a bit….limited. It is not as easy to try out, or to debug, as a GET or a POST request. I will admit I am a bit spoiled by tools like Swagger or Postman – it is sometimes really helpful to use a known payload to simulate a request and see the result before any web client even uses it.
But, in the last few versions, Postman has had a great new option – the ability to connect to a SignalR hub using a WebSocket connection and send and receive messages.
Setting Up a Request
To get started, you will need to run your API from Visual Studio with the SignalR hub and the desktop Postman app.
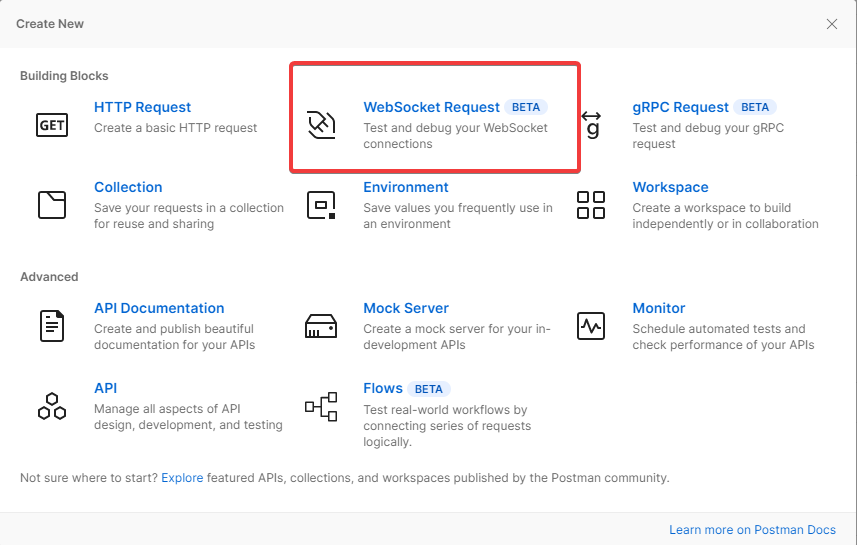
Choose “New” in Postman and select the WebSocket Request.
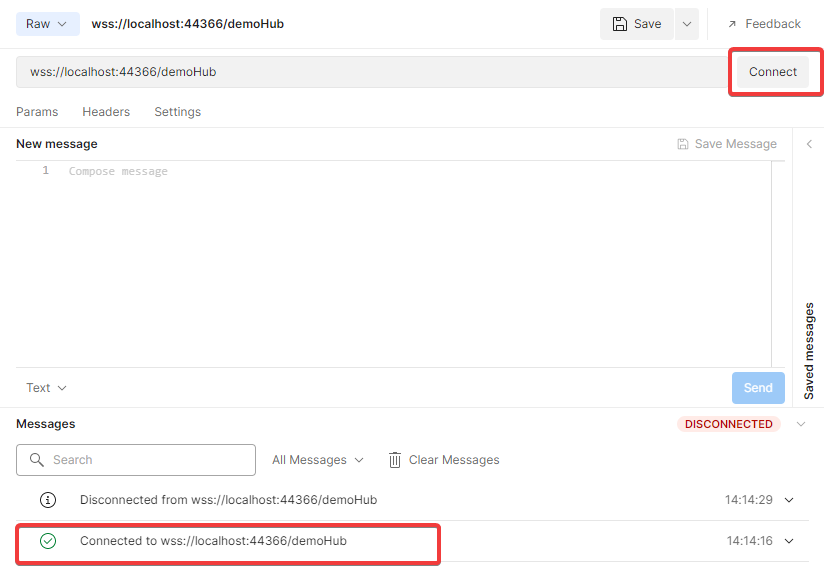
Now you can enter the server URL for the SignalR hub. This will usually start with WSS for a localhost instance. Be sure to include the port number. Now you can click the Connect button and you should see a new message under the Messages heading, stating that the connection was successful.
Sending the Protocol
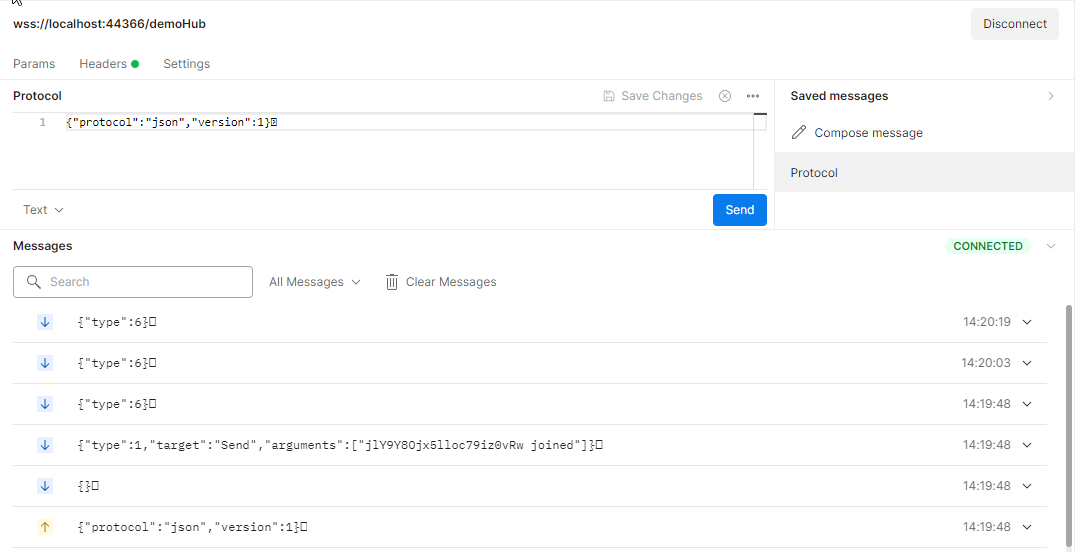
Now you are ready to start sending messages. Unfortunately, this is where most tutorials end. But there is a bit more useful information you need. First, the initial message you should always send to the hub is to set the protocol. In this case, we will communicate with JSON. Second, all messages must include the termination character. Postman shows this character as an ASCII unknown but it is actually ASCII character 0x1E.
{"protocol":"json","version":1}
After sending this message, you should see a response that the protocol was accepted, and you will begin to receive the heartbeat (type:6) messages from the hub. Great! Now you are connected, you are communicating with JSON and you are ready to send or receive payload messages.
You can also save your messages into the “Saved Messages” section. I find it helpful to save at least one of each type of message, especially the protocol request. Remember, you will have to send it each time you connect.
Joining a Group
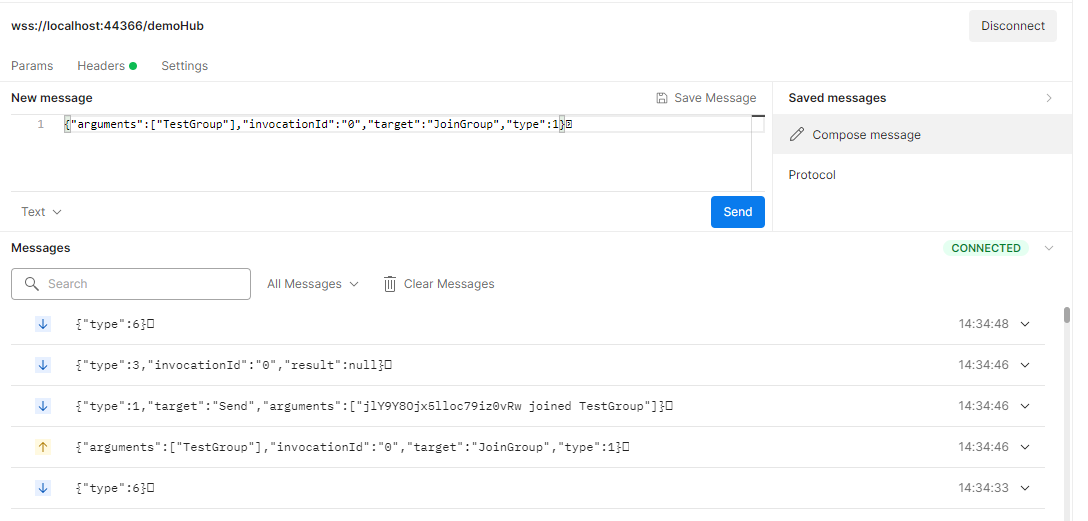
One example might be to join a group. You will need to use the exact name of the method from your SignalR hub. Parameters must be sent in an array, with invocation Id 0 and type 1. The message must again end with the null termination character.
{"arguments":["TestGroup"],"invocationId":"0","target":"JoinGroup","type":1}
Now you can see, the message was received (and can be debugged with a breakpoint in the SignalR hub), and is responding with a message and connection ID.
Below is the corresponding C# code for the hub method that is called.
/// <summary>
///     Subscribers can join groups by simply supplying a group name. If the group does not exist it will automatically be
///     created.
/// </summary>
/// <param name="groupName"></param>
/// <returns></returns>
public async Task JoinGroup(string groupName)
{
    await this.Groups.AddToGroupAsync(this.Context.ConnectionId, groupName);
    await this.Clients.Group(groupName).SendAsync("Send", $"{this.Context.ConnectionId} joined {groupName}");
}
If your hub uses an Authorize attribute, you will also need to include an authorization token in the connection. Microsoft provides an example of this here.
Now you are ready to go! You can test your SignalR messages just as you would any other endpoints. You can also check out the Postman documentation for more information. One thing I do hope to see soon is the ability to export a collection using WebSockets. Right now you aren’t able to export and share these collections.