Why Use Automated API Tests
In the world of modern software development and testing, the word “automation” has become a familiar one, and for good reason. When automation permeates our processes, it often serves our ultimate goal of saving our valuable time for other things that humans are better at.
Testing with Postman
Postman is probably the most popular tool for testing APIs. In this blog post, I will talk in more detail about how to do automating API testing in Postman, and show you some real-life examples of how you can use it yourself.
The main tool that we will use for automation in Postman is test scripts, which can either be written from scratch in JavaScript, or edited from ready-made snippets to suit your needs. Tests srcripts are launched immediately after Postman receives a response from an API, and all further interaction depends on the scripts and their assertions.
Let’s show some specific examples that Trailhead are currently using in our projects.
Using Test Scripts
Creating a Test, Extracting the Token
To get started writing test scripts, use the Tests tab in Postman. Before we can write a script, we will need to save the authorization token we grabbed from the real application and store it as an environment variable. Maybe it’s an obvious step, but without it, our next tests will not be authenticated, and none of the rest will work as expected.

Checking Status Codes
Now let’s create a simple test that will help us check the response code returned by an API. If the response code is a 200, the test will pass, otherwise it will fail.
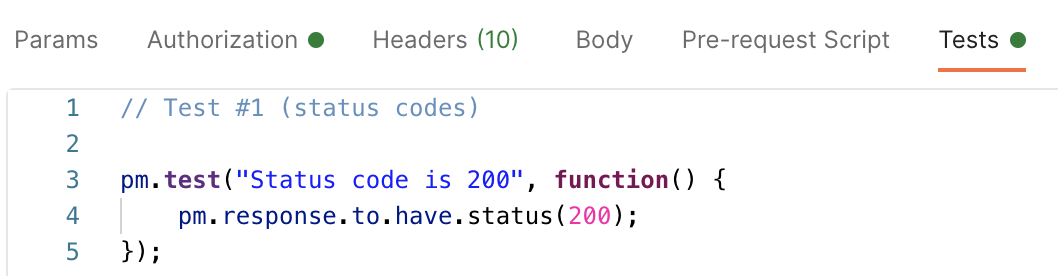
If you want to, you can also test for any other response codes used in APIs, like 200, 401 or 500, and pass or fail the test based on what’s expected. For example, we can write a separate branch in tests with the purpose of verifying that an unauthorized user will only get 401 status code response from the API on all of his requests.
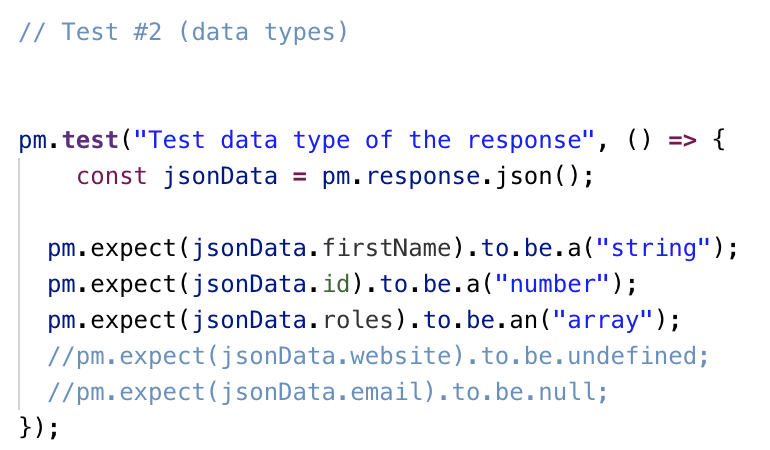
Testing the Data Type of the Response
We can also use tests to verify the data type of any part of a response. It can be helpful when we definitely know what data type some property value should have and any other data type in response would cause errors in the application.
Checking Properties
In the next couple tests, we will be working closely with the response data (image 4). In the test below (image 5) we have already verified that we have an email property and a mimeType property. If the mimeType property is nested inside another object named profilePhoto, we should use a little bit more complex script structure.

Image 4. Profile data API responseIn this case, the line of code below (image 5 outlined in red) won’t work, and we need to use the line of code below it to access this nested property.

Checking Property Values
For assessing values inside properties we can use a lot of methods like eql() and include(). While it’s very easy to check values inside properties like email and id, what about values for all properties inside roles? (image 4) As shown on the image (red outline in image 6), the usual test syntax won’t work for the roles property because the data inside it is in an array. We can’t access array property values quite as easily. Let’s move to the next couple of tests, in which I will explain how to work with such a structure in our API responses.

Arrays and Nested Objects (Part 1)
The test script below (image 7) allows us to work with all properties and values inside the roles array. It goes through each property inside the first item in the array, which requires that the array has a 0 index (at least one item inside this array). Of course, the logical question would be: “What to do in cases when we have 50 or 500 objects inside an array and we won’t know the index of the required object? For the answer to this, we will move to the next test script.

Arrays and Nested Objects (Part 2)
The test script below (image 9) perfectly solves our problem from the previous section, no matter how many objects we have in response (image 8).

To find any item in the array, all we need to know is the value of one the item’s properties. Using the find() method, our test script can search for the item in an array and identify exactly this object we are looking for. Then we can work with the properties of the object as shown previously. For example, we see the script below which refers to a response with a big number of objects (60) inside an items array (image 8). If we know the value of the id property, this id value will be our way to find the object we want to test.

Now you’ve seen several examples of how to use test scripts for working with response data from API requests, but, of course, there are many more examples of test scripts which you can find in the Postman documentation at https://learning.postman.com/docs/writing-scripts/script-references/test-examples/
Using Newman
The next common step after writing test scripts is to run them through a collection runner. I highly recommend using the Newman collection runner, since it’s a more powerful tool than the Postman UI, but it enables you to run and test a Postman collection directly from the command line. The main gain of using Newman is that this tool is a command-line tool, allowing easy integration into build systems and offering a lot of customization options.
Before getting started running tests with Newman, make sure that you have installed Node.js which is its only prerequisite.
There are different ways to run your tests through Newman and I will show one of those options which is the easiest and most popular. After opening your command line, you need to export your collection and environment from Postman and just use the path to them in the following commands:
newman run *path to your collection* -e *path to environment*
Newman will start running after you hit enter and you will see all the requests going out, all the tests results, and a bunch of additional information, even without opening the Postman UI (image 10).

Newman allows you to set any needed number of iterations with -n *number of iterations needed*. Also, you can set any data variables for each iteration by adding JSON or CSV file through command -d *path to file*.
If you want to integrate Newman with your CI/CD pipeline you can also check out the Postman documentation here: https://learning.postman.com/docs/running-collections/using-newman-cli/command-line-integration-with-newman/
Thanks for your attention. I hope you will now be able to enjoy successfully automating all your own API tests with Postman and Newman!