.NET MAUI is out, Xamarin.Forms support will end on May 1, 2024, and you are probably thinking “How can I migrate my Xamarin.Forms app to this new .NET MAUI framework?”
Fear not, my fellow developers! I shall provide an example of how we can migrate an app to .NET MAUI. However, there are some requirements you need to meet first before you can migrate an app, and those are:
- Your Xamarin.Forms app needs to use Xamarin.Forms 5.0 or higher, Android 5.0 (API 21) or higher, and iOS 10 or higher
- You need to have installed the complete environment setup for .NET MAUI including all necessary workloads. (And just in case, you might want to verify that you can create and run a default .NET MAUI application first)
For some older applications, those might not be trivial upgrades, so make sure you account for that in your planning. Once you have met the requirements listed above, you can begin with the upgrade! However, it’s recommended that you perform the migration in a separate branch of your code so you can roll back to the previous state just in case you break something. A large portion of the migration process involves fixing your code to adjust it for this new framework.
For this example, I’ll use the default Xamarin.Forms project template and name it MauiMigration. I created it using Visual Studio 2019 Version 16.11.18. The migration will be performed in Visual Studio 2022 Version 17.3.4.
The Automatic Part
You can manually migrate your app, but there are some tools to make our life easier. This awesome upgrade assistant can take care of those basic or repetitive tasks for you.
To get the latest version of the assistant, you can clone the repo linked above, load it in VS 2022, and open this file:
“upgrade-assistant\src\cli\Microsoft.DotNet.UpgradeAssistant.Cli\Properties\launchSettings.json”.
The “launchSettings.json” file is where we configure which solution we would like to migrate. As you might have guessed, we need to modify what’s in the “Upgrade” block of this file. Conserve the commandName and change the commandLineArgs to your solution’s .sln file path:
"Upgrade": {
"commandName": "Project",
"commandLineArgs": "upgrade C:\\Repos\\MauiMigration\\MauiMigration.sln",
"environmentVariables": {
"DOTNET_ENVIRONMENT": "Development"
}
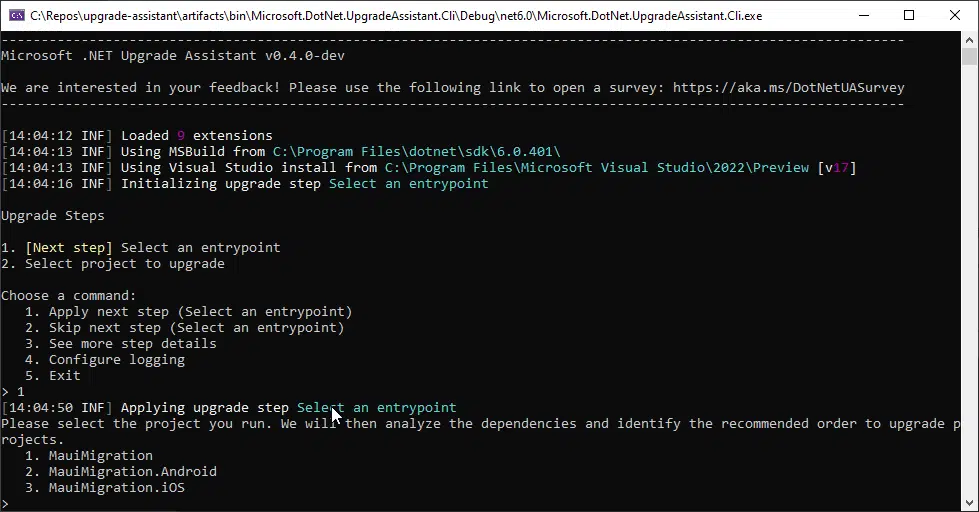
},Set Microsoft.DotNet.UpgradeAssistant.Cli as your Startup Project, Select the Upgrade option from the dropdown to run the solution, and it will open a terminal. What you need to do first is select the entry point. Select the first option by typing 1 and then Enter. It will show the available projects in the solution. In this case, I’ll begin with my Android application so I’ll select the second option.
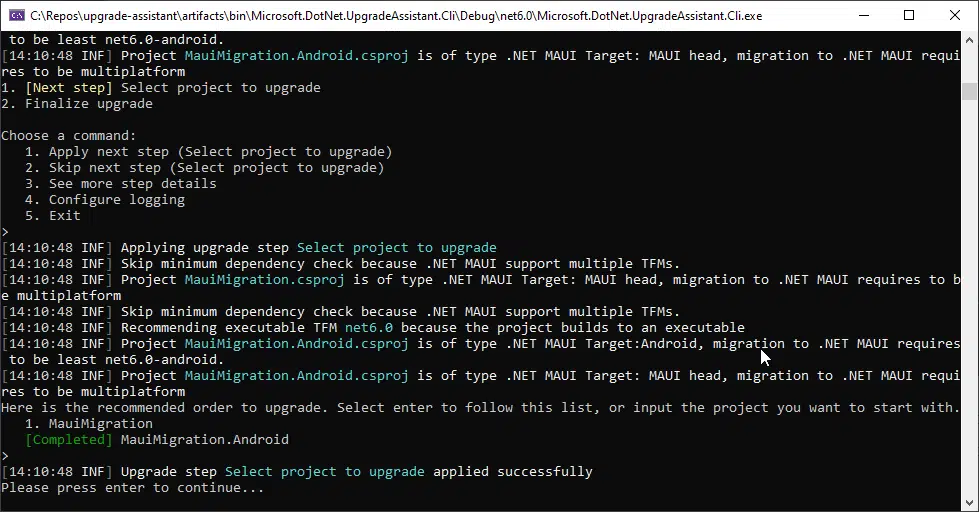
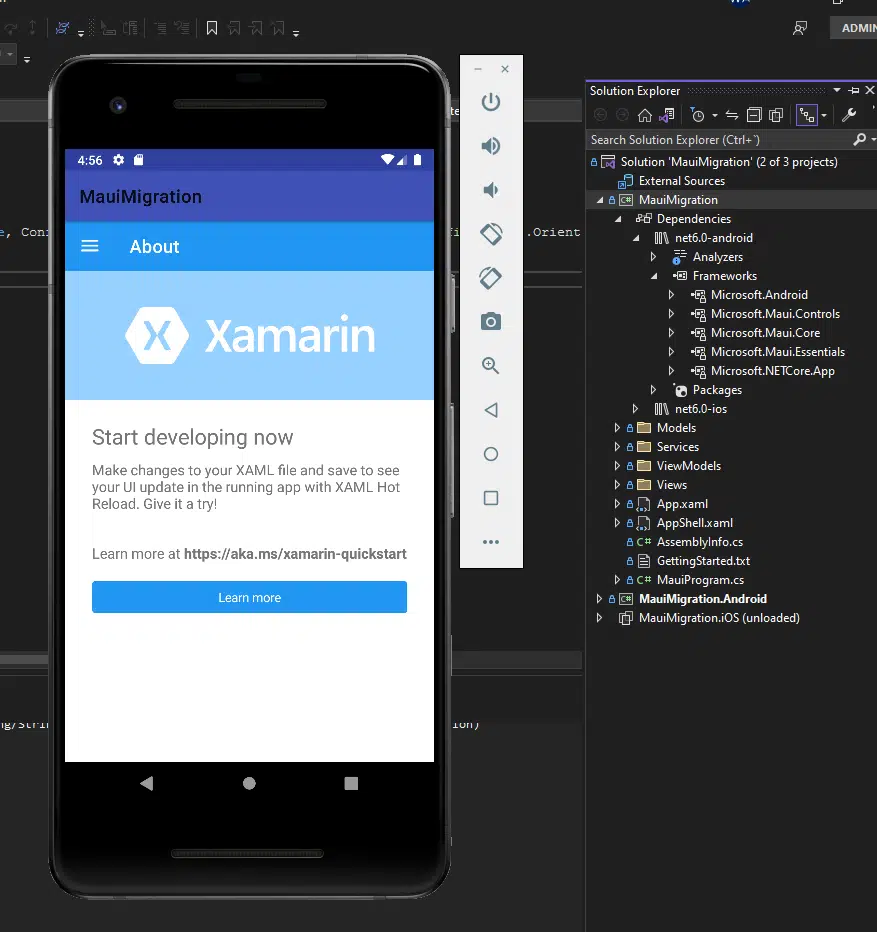
The assistant is pretty straightforward to use. Usually, you only need to select the “Apply next step” option and it will mainly take care of changing the namespaces, removing the unsupported libraries, and adding new .Net Maui packages. Once the tool has performed all the steps you should see this message informing you it’s done making changes in the Android project and it will begin with the Shared project.
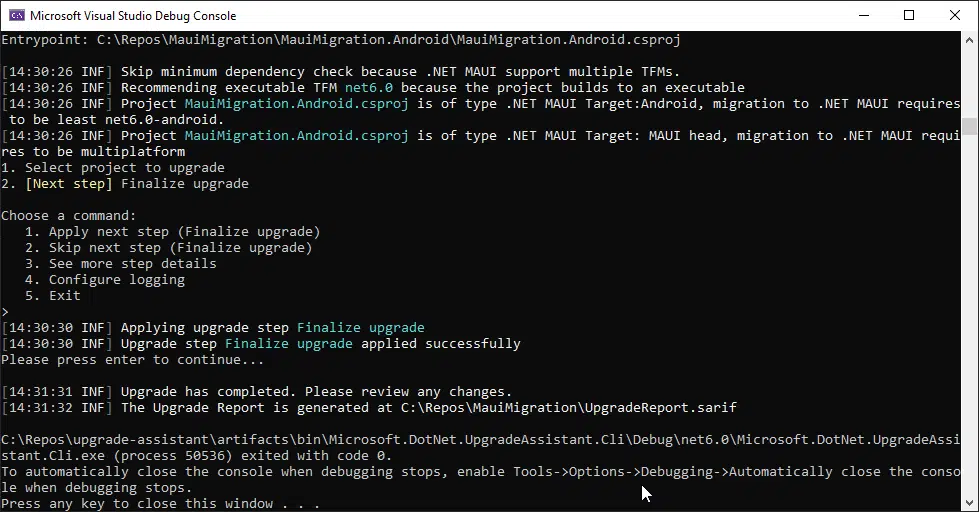
Once it’s done updating the Forms project, it will finish the update process. You can repeat these steps for the iOS project.
Now, let’s look at the changes:
- You will notice you won’t find any reference to the Xamarin.Forms or Xamarin.Essentials NuGet packages. The using aliases for them should have been replaced by Microsoft.Maui and Microsoft.Maui.Controls as well.
- If you check the .csproj files, you will see the TargetFramework element has net6.0-android;net6.0-ios instead of netstandard2.0 and it has a new element called UseMaui with true.
- There is a new file called MauiProgram.cs. Each platform entry point calls a
CreateMauiAppmethod on the staticMauiProgramclass in your app project, and returns aMauiApp, which is the entry point for your app - The Android csproj and iOS csproj files have been mostly rewritten. They no longer need to keep a reference for each platform-specific dependency.
The Manual Part
You have had fun watching the Upgrade Assistant do most of the work for you, but now it’s time to get your hands dirty. You will need some specific changes in our code to complete the migration.
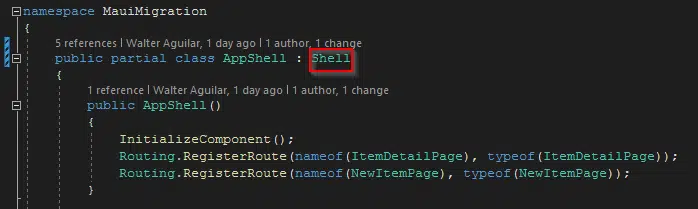
First, open the “AppShell.xaml.cs” file and change the inheritance from “Xamarin.Forms.Shell” to “Shell”.
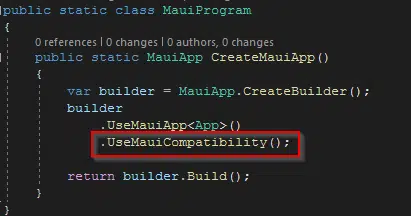
Next, open the MauiProgram.cs file and add the UseMauiCompatibility() method to the MauiApp builder.
Replace all instances of the xmlns=”http://xamarin.com/schemas/2014/forms” namespaces in your solution with xmlns=”http://schemas.microsoft.com/dotnet/2021/maui”.

Remove all the old references to Xamarin.Forms and look for replacements in MAUI. The “NewItemPage.xaml” page has some iOS specific platform configurations in Xamarin.Forms we should now migrate to MAUI (https://learn.microsoft.com/en-us/dotnet/maui/ios/platform-specifics/picker-selection).
Replace
“clr-namespace:Xamarin.Forms.PlatformConfiguration.iOSSpecific;assembly=Xamarin.Forms.Core”
with
“clr-namespace:Microsoft.Maui.Controls.PlatformConfiguration.iOSSpecific;assembly=Microsoft.Maui.Controls”
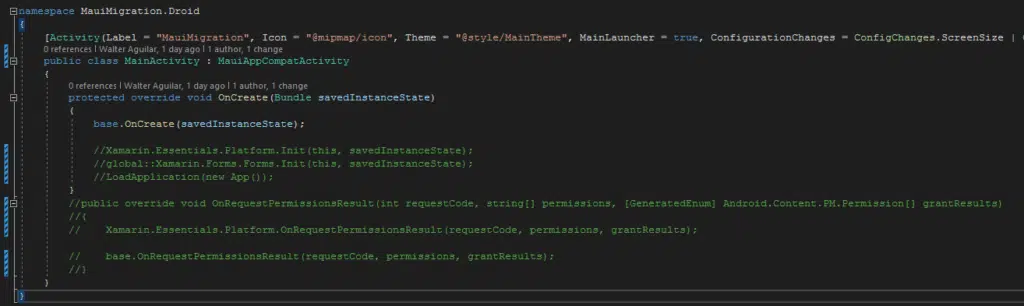
Go to your MainActivity.cs file in the Android project and update the inheritance from “global::Xamarin.Forms.Platform.Android.FormsAppCompatActivity” to “MauiAppCompatActivity”. Then, delete the LoadApplication() call and everything related to Xamarin in the OnCreate method. Remove the OnRequestPermissionsResult method as well.
Remove the “Resource.designer.cs” file from your Android project.
Change your AndroidManifest to target SDK version 31.
Finally, for iOS, you only need to modify the iOS.csproj file like this:
<Project Sdk="Microsoft.NET.Sdk">
  <PropertyGroup>
    <UseMaui>true</UseMaui>
    <TargetFramework>net6.0-ios</TargetFramework>
    <OutputType>Exe</OutputType>
    <ImplicitUsings>enable</ImplicitUsings>

  </PropertyGroup>

  <ItemGroup>
    <ProjectReference Include="..\MauiMigration\MauiMigration.csproj">
      <Project>{B70FC50C-9208-4D8E-AA8B-0F0FB805FCCB}</Project>
      <Name>MauiMigration</Name>
    </ProjectReference>
  </ItemGroup>
</Project>
Replace my ProjectReference with your own in the code above. The data should be at the end of the unmodified iOS.csproj file.
That should be enough to make the app work with .NET MAUI! You can review more about the steps recommended by Microsoft here. You can also check out my repo if you want to take a look at the specific changes I made for this mini-guide.
Conclusion
And that’s it! Remember each project is different and the steps performed here may vary for you somewhat. Always be sure to check the .NET MAUI site for the latest changes!
Happy coding!