Google Maps Markers for Angular

Google Maps provides powerful mapping technology that you can use in your own applications. In this blog, I’ll explain how you can get started using markers in Google Maps in your Angular web applications.

Introduction

In one of the previous posts, we learned how to integrate Google Maps into an Angular web application.

In this post, I will show you how to add markers to your map and how to configure each marker with positioning, use a custom icon for your markers, and a few other useful tricks.

There are two options for adding a Marker to the map:
1. Adding a Marker using <map-marker></map-marker> tag in HTML
2. Adding a Marker using the new google.maps.Marker() method in JavaScript

Preparation of Data for Google Maps Markers

The marker has a set of properties that are used to display and process Output events to the Marker on the Map.

The full reference to the API can be found in the Google Maps API Docs and the Angular implementation in the source code.

To begin with, we will create an interface for our Markers (in the future we will update this interface to add new options to the Marker), with one option position:

import { Component, ViewChild } from '@angular/core';
import { GoogleMap } from '@angular/google-maps';

interface MarkerProperties {
  position: {
    lat: number;
    lng: number;
  }
};

@Component({
  selector: 'app-root',
  templateUrl: './app.component.html',
  styleUrls: ['./app.component.css']
})

export class AppComponent {
  @ViewChild('myGoogleMap', { static: true }) map!: GoogleMap;

  mapOptions: google.maps.MapOptions = {
    center: { lat: 48.8588548, lng: 2.347035 },
    zoom: 13,
  };
}

After that, we will create an array of markers, I added the positions of several markers:

import { Component, ViewChild } from '@angular/core';

interface MarkerProperties {
  position: {
    lat: number;
    lng: number;
  }
};

@Component({
  selector: 'app-root',
  templateUrl: './app.component.html',
  styleUrls: ['./app.component.css']
})

export class AppComponent {
  mapOptions: google.maps.MapOptions = {
    center: { lat: 48.8588548, lng: 2.347035 },
    zoom: 13,
  };

  markers: MarkerProperties[] = [
    { position: { lat: 48.8584, lng: 2.2945 }}, // Eiffel Tower
    { position: { lat: 48.8606, lng: 2.3376 }}, // Louvre Museum
    { position: { lat: 48.8530, lng: 2.3499 }}, // Cathédrale Notre-Dame de Paris
  ];
}

Adding a Marker Using the MapMarker Component

Using the prepared marker interface, in the HTML file of the component, we will add ngFor to the <map-marker> tag and update our template:

<div class="map">
  <google-map height="100vh"
              width="100%"
              [options]="mapOptions">
    <map-marker *ngFor="let marker of markers"
                [position]="marker.position"></map-marker>
  </google-map>
</div>
Google Maps displaying 3 Markers added using tags

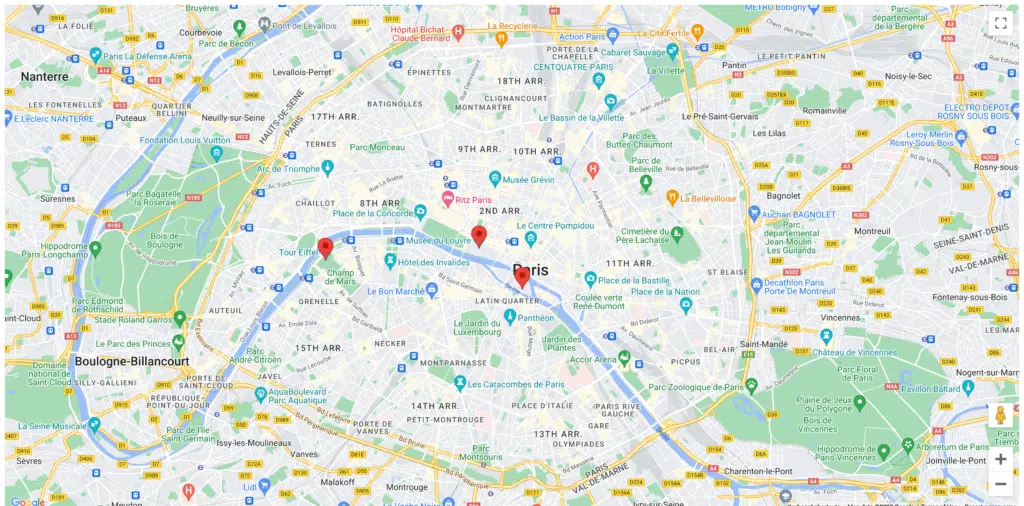
Adding a Marker Using the new google.maps.Marker() Method

To use the new google.maps.Marker() method to add a Marker to the map, we will update our component:

In the HTML file, you need to remove the tag and add an outgoing event handler for the tag.

<div class="map">
  <google-map height="100vh"
              width="100%"
              [options]="mapOptions"
              (mapInitialized)="handleMapInitialized($event)">
  </google-map>
</div>

mapInitialized event – an outgoing event that signals that the map is ready for work

readonly mapInitialized: EventEmitter<google.maps.Map>;

In the component, you need to add a handler for mapInitialized, the <google-map> output event

import { Component } from '@angular/core';

interface MarkerProperties {
  position: {
    lat: number;
    lng: number;
  }
};

@Component({
  selector: 'app-root',
  templateUrl: './app.component.html',
  styleUrls: ['./app.component.css']
})

export class AppComponent {
  mapOptions: google.maps.MapOptions = {
    center: { lat: 48.8588548, lng: 2.347035 },
    zoom: 13,
    mapTypeControl: false,
  };

  markers: MarkerProperties[] = [
    { position: { lat: 48.8584, lng: 2.2945 }}, // Eiffel Tower
    { position: { lat: 48.8606, lng: 2.3376 }}, // Louvre Museum
    { position: { lat: 48.8530, lng: 2.3499 }}, // Cathédrale Notre-Dame de Paris
  ];

  handleMapInitialized(map: google.maps.Map) {}
}

After adding the method to the component, let’s move on to adding Markers. We can add functionality for creating Markers to the map’s output event processing method like this:

handleMapInitialized(map: google.maps.Map) {
  this.markers.forEach((marker: MarkerProperties) => {
    new google.maps.Marker({
      position: marker.position,
      map,
    });
  });
}
Google Maps display 3 Markers added using event

Conclusion

I hope this quick guide to using Google Maps markers will help you easily get started using Google Maps markers in your Angular application. As we can see from the results, these two approaches work equally well, so the choice is yours which approach is best for your needs.

Related Blog Posts

We hope you’ve found this to be helpful and are walking away with some new, useful insights. If you want to learn more, here are a couple of related articles that others also usually find to be interesting:

Our Gear Is Packed and We're Excited to Explore With You

Ready to come with us? 

Together, we can map your company’s software journey and start down the right trails. If you’re set to take the first step, simply fill out our contact form. We’ll be in touch quickly – and you’ll have a partner who is ready to help your company take the next step on its software journey. 

We can’t wait to hear from you! 

Main Contact

This field is for validation purposes and should be left unchanged.

Together, we can map your company’s tech journey and start down the trails. If you’re set to take the first step, simply fill out the form below. We’ll be in touch – and you’ll have a partner who cares about you and your company. 

We can’t wait to hear from you! 

Montage Portal

Montage Furniture Services provides furniture protection plans and claims processing services to a wide selection of furniture retailers and consumers.

Project Background

Montage was looking to build a new web portal for both Retailers and Consumers, which would integrate with Dynamics CRM and other legacy systems. The portal needed to be multi tenant and support branding and configuration for different Retailers. Trailhead architected the new Montage Platform, including the Portal and all of it’s back end integrations, did the UI/UX and then delivered the new system, along with enhancements to DevOps and processes.

Logistics

We’ve logged countless miles exploring the tech world. In doing so, we gained the experience that enables us to deliver your unique software and systems architecture needs. Our team of seasoned tech vets can provide you with:

Custom App and Software Development

We collaborate with you throughout the entire process because your customized tech should fit your needs, not just those of other clients.

Cloud and Mobile Applications

The modern world demands versatile technology, and this is exactly what your mobile and cloud-based apps will give you.

User Experience and Interface (UX/UI) Design

We want your end users to have optimal experiences with tech that is highly intuitive and responsive.

DevOps

This combination of Agile software development and IT operations provides you with high-quality software at reduced cost, time, and risk.

Trailhead stepped into a challenging project – building our new web architecture and redeveloping our portals at the same time the business was migrating from a legacy system to our new CRM solution. They were able to not only significantly improve our web development architecture but our development and deployment processes as well as the functionality and performance of our portals. The feedback from customers has been overwhelmingly positive. Trailhead has proven themselves to be a valuable partner.

– BOB DOERKSEN, Vice President of Technology Services
at Montage Furniture Services

Technologies Used

When you hit the trails, it is essential to bring appropriate gear. The same holds true for your digital technology needs. That’s why Trailhead builds custom solutions on trusted platforms like .NET, Angular, React, and Xamarin.

Expertise

We partner with businesses who need intuitive custom software, responsive mobile applications, and advanced cloud technologies. And our extensive experience in the tech field allows us to help you map out the right path for all your digital technology needs.

  • Project Management
  • Architecture
  • Web App Development
  • Cloud Development
  • DevOps
  • Process Improvements
  • Legacy System Integration
  • UI Design
  • Manual QA
  • Back end/API/Database development

We partner with businesses who need intuitive custom software, responsive mobile applications, and advanced cloud technologies. And our extensive experience in the tech field allows us to help you map out the right path for all your digital technology needs.

Our Gear Is Packed and We're Excited to Explore with You

Ready to come with us? 

Together, we can map your company’s tech journey and start down the trails. If you’re set to take the first step, simply fill out the contact form. We’ll be in touch – and you’ll have a partner who cares about you and your company. 

We can’t wait to hear from you! 

Thank you for reaching out.

You’ll be getting an email from our team shortly. If you need immediate assistance, please call (616) 371-1037.