Microsoft CEO Satya Nadella says “bots are the new apps.” If that’s the case, then developers are going to need a cross-platform way to build those bots, just like they have cross-platform frameworks for building mobile app.
Good news, because Microsoft has built just such a framework in their Azure Bot Service. Think of it as fulfilling the same role Xamarin or React Native currently fill for cross-platform mobile app development, but for chat bots instead.
Many Chat Platforms for the Price of One
Let’s say you want to build a chat bot and make it available on Skype, Facebook Messenger, Slack, and SMS (via Twillio). You could either build 4 different bots on those 4 different platforms, or you could build just a single REST API service, and use Azure Bot Services to integrate it into all four platforms. Obviously, it is less work and maintenance for you if you build and maintain just one codebase.
Azure Bot Services allow you do build a single bot as a REST service, something most web and mobile developers are already very familiar with. You then expose that service to a Bot you set up on your Azure account and wire up to the various services, or channels, such as Facebook messenger, Twillio, Slack, and Skype. Microsoft calls this their “Bot-as-a-Service” offering, the first in the industry, but you could simply think of it as a “connector” that wires your REST service bot implementation to all the different chat channels.

Bus Position Service: Step-by-Step Example
To show how easy it is, I wrote a simple Bot Service using ASP.NET which gives you the position of a bus in my local system, The Rapid, in Grand Rapids, MI. It does this by using a public API for realtime bus positions. Using the position it returns, I’m generating a map image using Google Map’s static image API. Here’s how I did it:
- If you don’t have an Azure account, go sign up for a free one by starting here: https://azure.microsoft.com/en-us/free
- Once you’ve sign up and you’re in the Azure Portal, create a new resource.

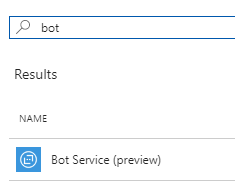
- Search for “bot” to see the Bot Service resource.

- Click on Bot Service, then Create.
- You’ll answer a few questions about hosting your Bot Service, then click Create again.
- Azure will create your service for you in the background and alert you when it’s complete.
- The Azure portal will create an ASP.NET project template for you to download, but I created my own from scratch.
- In Visual Studio, I created a new ASP.NET (.NET Framework) project, and added only Web API to it. No .NET Core support just yet for Bot Framework as of the time of this posting!
- Then, I added the Microsoft.Bot.Builder NuGet package.
- Now, add a Dialog class to your project. This is the class that manages the conversation. You can use this starter template:
public class BusDialog : IDialog<object> { public Task StartAsync(IDialogContext context) { context.Wait(MessageReceivedAsync); return Task.CompletedTask; } private async Task MessageReceivedAsync(IDialogContext context, IAwaitable<object> result) { // return our reply to the user await context.PostAsync("Hello"); context.Wait(MessageReceivedAsync); } } - Finally, add a MessagesController to be the entry point for REST calls into your bot. The Controller can handle system events here and pass new messages off to the Dialog class.
[BotAuthentication] public class MessagesController : ApiController { /// <summary> /// POST: api/Messages /// Receive a message from a user and reply to it /// </summary> public async Task<HttpResponseMessage> Post([FromBody]Activity activity) { if (activity.Type == ActivityTypes.Message) { await Conversation.SendAsync(activity, () => new BusDialog()); } else { HandleSystemMessage(activity); } var response = Request.CreateResponse(HttpStatusCode.OK); return response; } private Activity HandleSystemMessage(Activity message) { if (message.Type == ActivityTypes.DeleteUserData) { // Implement user deletion here // If we handle user deletion, return a real message } else if (message.Type == ActivityTypes.ConversationUpdate) { // Handle conversation state changes, like members being added and removed // Use Activity.MembersAdded and Activity.MembersRemoved and Activity.Action for info // Not available in all channels } else if (message.Type == ActivityTypes.ContactRelationUpdate) { // Handle add/remove from contact lists // Activity.From + Activity.Action represent what happened } else if (message.Type == ActivityTypes.Typing) { // Handle knowing tha the user is typing } else if (message.Type == ActivityTypes.Ping) { } return null; } } - Notice the Post method, which gets called whenever you get a new message. It is also called when you get a system message such as a state change, a user typing a message, or a user being removed. Notice that if the activity is a new Message, it’s passed to the BusDialog class we created earlier.
- You may have noticed that our Controller was secured with a BotAuthentication attribute. To make sure only your Azure Bot Service is able to call your API, go to the Settings tab under your bot service in the Azure portal and click the Manage Microsoft App ID and Password button. Copy the AppId and Password you generate on this page and put it in the AppSettings section of your App.config file like this:
<add key="MicrosoftAppId" value="[YOUR APPID HERE]" />
<add key="MicrosoftAppPassword" value="[YOUR PASSWORD HERE]" />
- Now, deploy your app to the Azure web service you already configured when you setup the new Bot Service. If you used the downloaded project template, it should be connected already, if not, you will need to create a new publish profile.


- With your Bot Service live on Azure, you now simply need to set up the platforms (i.e., “channels”) you’ll publish this bot through. I choose Skype, Slack, and Twillio (SMS) for my service. Click the Channels tab and the UI will walk you through the sets for each channel. Typically, you’ll need to sign up as an app on each platform and get an ID and a Password/Secret from each one to paste into your Azure Bot’s channel configuration so it knows how to securely communicate with that platform.
- You now have everything in place to test our your platform. Here are some screenshots of my bot working on some different channels.


Skype

Slack

SMS (via Twillio)

Want to try it for yourself? You can download the full project from my github.


