Nowadays, everything related to the crypto-world is becoming more and more popular. I bet you’ve also thought about launching your own successful startup with millions in investments! As the saying goes, though, no pain no gain. But at least let’s make the development of smart contracts less painful… Choosing the right development kit and setting up the environment is a first step to success. In this blog we’ll consider the most popular solutions for starting up your decentralized app, such as:
- Remix IDE
- Intellij-Solidity Plugin + Truffle + Ganache
- Solidity Extension for Visual Studio + Blockapps-bloc
Remix IDE
Remix — is a web-based IDE for writing, deploying and running Solidity smart contracts. For now, it’s one of the most featured IDEs for smart contracts. After opening the Remix website you’ll see something like this:
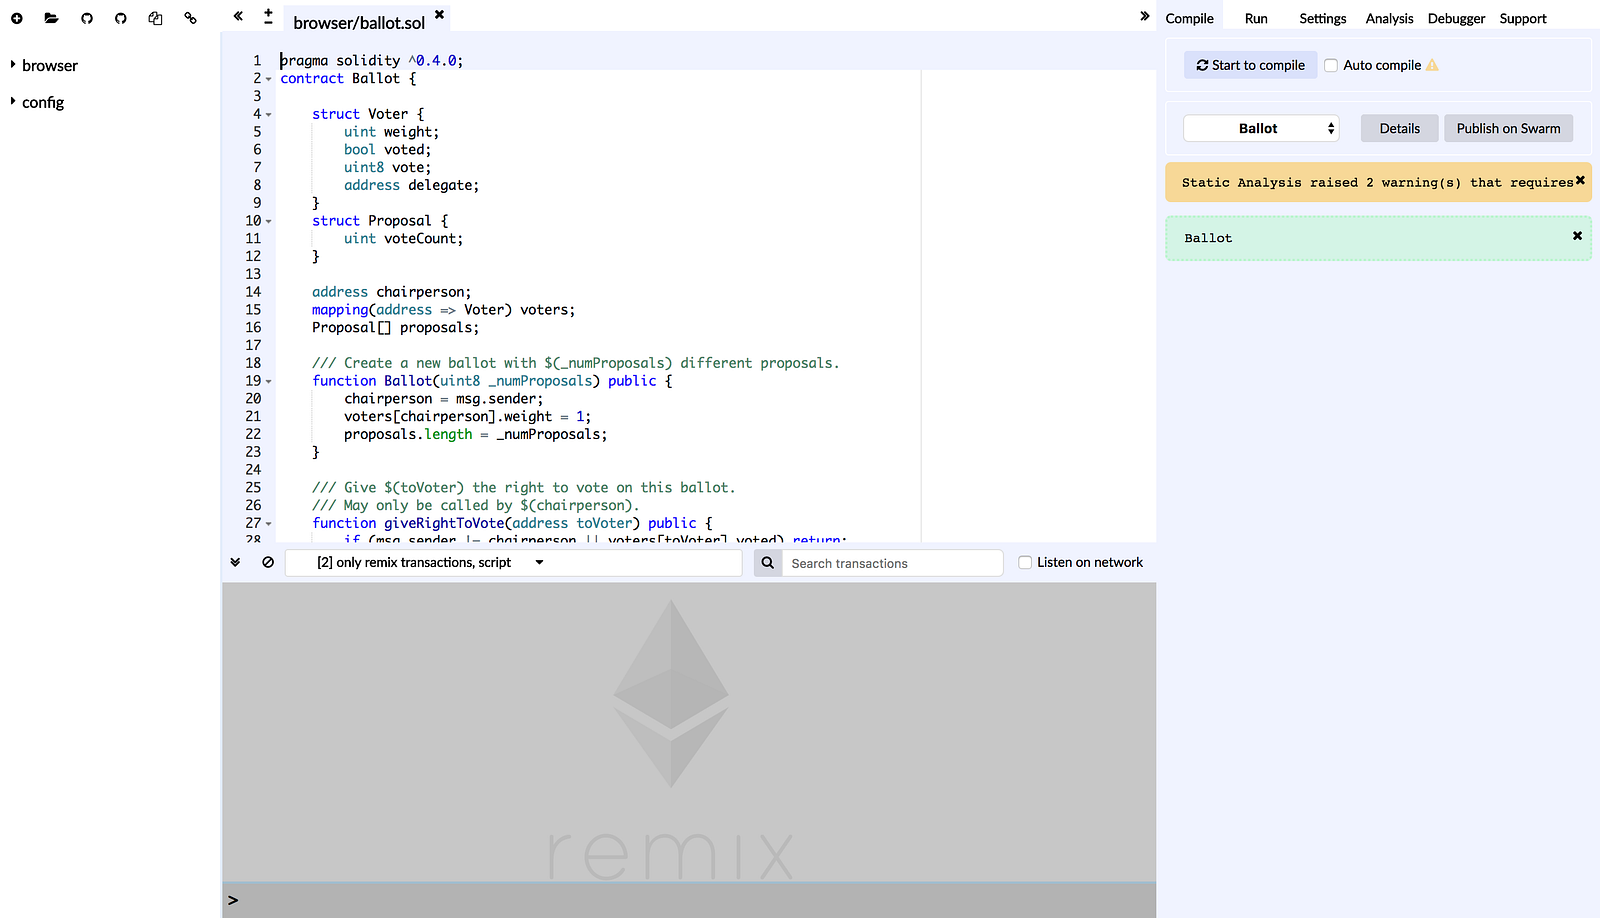
Remix offers you an out-of-the-box ready solution for decentralized app development. You don’t have to install any plugins or modules, just open the browser and start coding. Everything else is already done for you.

Pros:
- Code highlighting and analysis
- Terminal with integrated JavaScript interpreter and the
web3object - Running locally stored files
- Ability to run transactions, deploy and compile smart contracts
Cons:
- Works only in web browser
- Clearing of LocalStorage will remove all of your files (there is a workaround with using RemixD)
Intellij-Solidity Plugin + Truffle + Ganache
Intellij-Solidity — is a plugin for Intellij-based IDEs such as Webstorm, PhpStorm and PyCharm. This plugin offers syntax highlighting, code formatting and autocomplete for Solidity files. However, it doesn’t provide any solutions for compiling and deploying contracts.
For compiling and deploying you can use Truffle Framework with Ganache CLI.
Truffle Setup
Firstly, you have to install Truffle globally using the npm package manager:
npm install -g truffle
Then you have to create a new directory for your project and go into it (the directory has to be empty):
mkdir MyFirstSolidityProject
cd MyFirstSolidityProject/
And finally run init truffle in our project directory:
truffle init
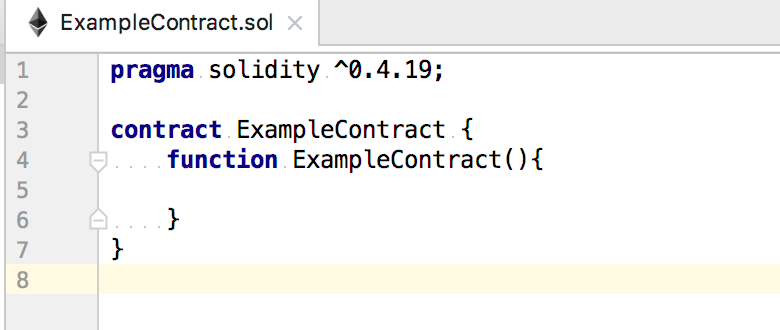
After initializing truffle in your project directory, you’ll get the following files generated:

We will cover why we need these files in the next blog. For now, we’ll just add some code to our truffle.js file to make it look like this:
module.exports = {
    networks: {
        development: {
            host: "127.0.0.1",
            port: 7545,
            network_id: "*"
        }
    }
}
Here we specified the environment, called development, running on 127.0.0.1:7545. We’ll use it for deploying our contracts to the local Ethereum network.
Ganache CLI Setup
Now we have to install the Ganache CLI package globally with the npm package manager:
npm install -g ganache-cli
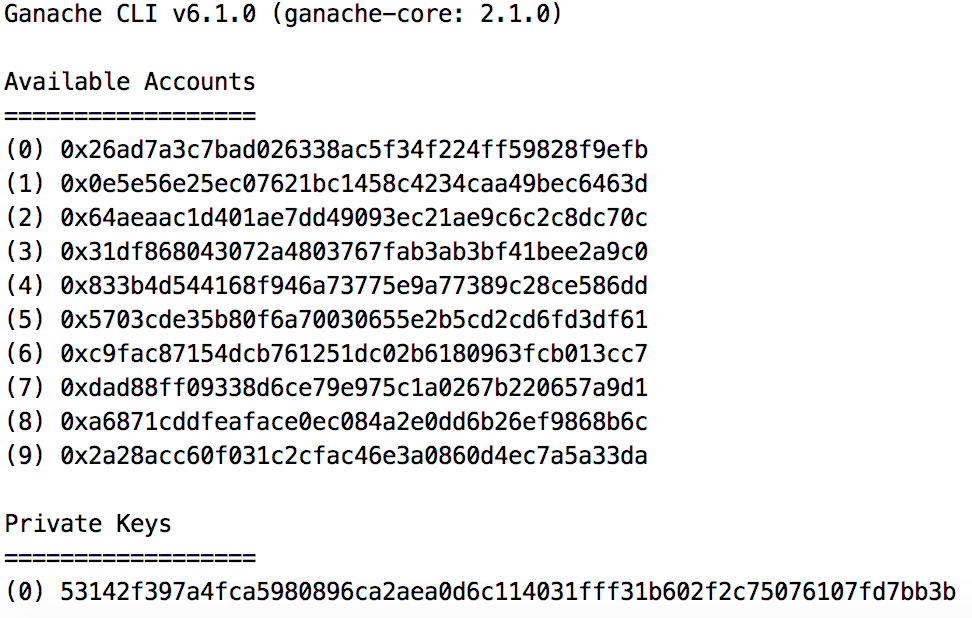
Ganache will run a local instance of the Ethereum network on your machine, which may be useful during development and debugging. We have to run ganache on the port specified for our development environment above (7545). This could be done by the following command:
ganache-cli -p 7545
After that you’ll see a list of generated test account addresses, their private keys, and mnemonic phrases for the wallet:
Wrap Up
Now that we have the local network up and running, we can compile and migrate our project to that network. To do this, we have to run the following command:
truffle compile
This will generate a json file for our contracts under ./build/contracts directory. Then we will migrate this data to the network using the developmentenvironment:
truffle migrate --network development
Pros:
- Can be used in many modern IDE’s without breaking previous settings
- Supports goto declarations, code completion, syntax highlighting
- Provides file templates for generated contracts and libraries
- Truffle and Ganache provide a big variety of project setups with React, Redux, Authentication etc.
Cons:
- The Intellij-Solidity plugin is currently in alpha, so it could have some bugs
- A lot of actions have to be done manually for setting up the compilation and deployment process
Solidity extension for Visual Studio + Blockapps-bloc
The Solidity extension enables smart contract development in Visual Studio IDE. It allows you to start a new project for your decentralized app with everything set up.

This extension requires installation of the blockapps-bloc package. This package allow you to run a local Ethereum network (like ganache-cli).
Blockapps-bloc Setup
Firstly, we have to go to our project directory and install the blockapps-blocpackage using the npm package manager:
npm install blockapps-bloc
Then we have to initalize this module with a name, username and apiUrl of your choice. You’ll be prompted to supply that info after running the following command:
bloc init
After that, install the required npm packages and start bloc package:
npm install
bloc start
Now we have a server running on the default 8000 port. VS extension will use this server by default. You can check or change the extension properties in Visual Studio in the Project Properties dialog:

Pros:
- Ability to setup multi-project applications with ASP.NET or Node.js
- Ready-to-use application templates
- Provides compiling and deploying of smart contracts
Cons:
- Needs some additional package installation (blockapps-bloc)
- A lot of issues from users, related to expired certificates, that could make extension unavailable for some time
Conclusion
All in all, we’ve discovered the most popular solutions for setting up your environment and starting to develop smart contracts for Solidity with ease. I hope you’ve found something appropriate for your needs. In the next blog we’ll write our first smart contract and will deploy it to the local network.


